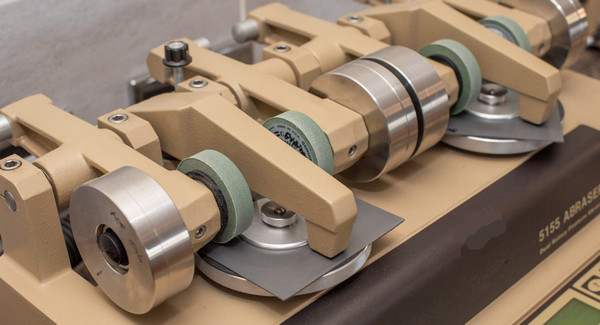
-
How to properly calibrate the Taber Linear Abraser 5750?
Edited by:Read:Calibrating the Taber Linear Abraser 5750 is essential to ensure accurate and reliable test results. The calibration process involves verifying and adjusting various parameters of the instrument to meet the required specifications. Here are the steps to properly calibrate the Taber Linear Abraser 5750:
1. Gather the necessary equipment: To perform the calibration, you will need a calibration kit provided by Taber Industries or an authorized distributor. This kit typically includes calibration disks, weights, and tools required for adjustment.
2. Verify the rotational speed: Set the rotational speed of the turntable to the desired value specified in the test method or according to industry standards. This can be done using the control panel or interface of the Taber Linear Abraser 5750. Ensure that the RPM matches the intended speed accurately.
3. Calibration disk installation: Install the appropriate calibration disk on the turntable. Calibration disks are specifically designed for the calibration process and have known wear characteristics. They are available in different materials and surface finishes, depending on the specific requirements of the calibration.
4. Adjust the load arm tension: The load arm tension should be adjusted to apply the correct load during testing. Consult the user manual or calibration instructions provided by Taber Industries for the recommended procedure to adjust the load arm tension. Ensure that the load applied corresponds to the desired force specified in the test method or industry standard.
5. Verify the contact angle: The Taber Linear Abraser 5750 allows adjustment of the contact angle between the specimen and the abrasive material. Use a protractor or other suitable measuring device to measure the current contact angle. Ensure that the angle matches the desired specification, and make adjustments if necessary.

6. Check the test stroke length: Measure the actual stroke length of the linear traverse system. This can be done using a ruler or measuring tape. Compare the measured stroke length with the desired stroke length specified in the test method or industry standard. Adjust the stroke length if needed to match the required value.
7. Inspect the condition of the abrasion wheels: Check the condition of the abrasion wheels for any signs of wear or damage. Replace worn-out or damaged wheels with new ones as per the manufacturer's instructions. Ensure that the replacement wheels are compatible with the Taber Linear Abraser 5750.
8. Repeat calibration periodically: Calibration should be performed periodically to maintain the accuracy of the instrument. The frequency of calibration depends on the usage and requirements set by the test method or industry standards. It is recommended to follow the calibration schedule recommended by Taber Industries or consult with their technical support team.
9. Maintain proper documentation: Keep detailed records of the calibration process, including dates, results, and any adjustments made. This documentation will serve as a reference for future calibration cycles and help ensure traceability and quality control.
10. Follow manufacturer guidelines: Always refer to the user manual, calibration instructions, and guidelines provided by Taber Industries for specific calibration procedures and recommendations. These instructions may vary depending on the model and version of the Taber Linear Abraser 5750.
Proper calibration of the Taber Linear Abraser 5750 is crucial for obtaining accurate and reliable test results. By following the recommended calibration procedures and maintaining regular calibration intervals, you can ensure the instrument performs optimally and provides consistent and precise data.
- 2024-04-19Paper ring compression strength tester standards
- 2024-04-19Cupping tester standards
- 2024-04-19Rubber and plastic tensile tester standards
- 2024-04-19Taber 1750 wear-resistant tester standards
- 2024-04-19Stone Chip Resistance Gravelometer standards
- 2024-04-18Diaper absorption speed tester standards
- 2024-04-18Diaper leakage tester technical indicators
- 2024-04-18Paint film impact resistance tester standards
- 2024-04-18Low temperature brittleness tester principle
- 2024-04-18Battery separator permeability tester technical indicators


