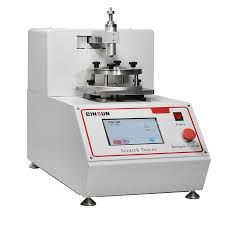
Blanket combustion tester conforms to ASTM D4151 related test standards and is used to test the flame retardancy of flanket and other plush fabrics. The sample and test paper installed on the sample fixture shall be ignited with standard flame for 1s to complete the test. Grade the sample by observing the change of the test paper.
Blanket test standard description:
The blanket combustion tester tests the specimen according to the ASTM D4151 test standard.
The sample preparation and testing process is more complicated. Sample preparation and test operations can be performed according to the operating instructions.
The main operation steps and some useful operation tips of the blanket combustion tester operation manual will be presented as follows.
The instrument is completed in strict accordance with the standard drawings, fully complies with and can realize the test content required by the standard. The ignition time can be set arbitrarily, and it can be accurately recorded to 0.01s.
The construction of the blanket combustion tester includes.
(1) Flow meter: to regulate the size of the gas flow.
(2) Spitfire tube: The gas is first connected to the flow meter through a hose and then passed through a hose at the rear of the box into the spitfire tube.
(3) Wind baffle: the upper part of the wind baffle is placed in glass. The test is carried out in a ventilated kitchen, where a circular hole in the top of the box and a gap in the baffle allow convection of the gas. (4) Control panel: Power - power switch; Start: start the internal motor operation, after the jet pipe is moved to the test position (vertical distance of 8mm from the centre of the specimen, horizontal distance of 3.2mm) touch the internal timing switch; Reset: timer is cleared/fire pipe reset.
(5) Specimen fixture and specimen holder. The specimen holder base plate has knobs that can be adjusted to move left and right, by loosening and tightening the knobs, the specimen holder base plate is moved and fixed.
(6) Timer: displays the set and actual ignition time. The fire tube will only complete the required movement after the timer has been cleared, otherwise the fire tube will not return to its initial position after moving forward.
Explanation of the steps in the blanket combustion measurement laboratory.
After sample preparation and instrument commissioning, place the assembled specimen jig on the specimen clamp. Open the gas valve and supply gas to the fire tube. Ignite with an electronic lighter aimed at the nozzle. Press the START button on the control panel and, with the mechanical drive, the flamepipe moves forward to the test position and ignites the specimen and test paper on the specimen holder. After 1s, the fire tube moves back and the timer stops recording the time, the test is over. Finally the specimen and test paper are removed for grading.
A device debugging:
Make sure the blanket burn tester is operational.
(1) Adjust the position of the fire pipe
With the aid of a height gauge, make the vertical distance between the flame-throwing needle and the test sample 8mm.
Move the sample holder so that the sample CITIC is 3.2mm away from the flame-throwing needle during the test.
(2) Adjust the ignition time
Set the ignition time on the timer panel. Press the start button, the fire tube will move to the test position under the drive of the motor, and after staying for a certain period of time (the time of staying is the ignition time), the fire tube will move backward. The dwell time is displayed on the timer, if this time is consistent with the set ignition time, it means that the instrument can be used normally.
(3) Adjust the flame length
Check that the installation process of the instrument has been completed according to the operation manual. Turn on the gas supply (use methane, technical grade, purity >97.0%), and ventilate for a certain period of time in a ventilated environment; ensure that the instrument is powered on, turn off the fume hood, and adjust the flame length to 16mm (5/8 inches) after ignition . The length of the flame is measured by the flame length gauge in the accessory.
Tips: Before adjusting the flame height, it is necessary to evacuate (exhaust the air in the pipeline). The standard stipulates that the evacuation time is at least 5 minutes. To ensure your safety, this step must be performed in a fume hood or other well-ventilated environment. When adjusting the flame length, in order to avoid the influence of wind speed, the ventilation equipment will be closed.
Tip: Pay attention to the use of height gauge and flame length gauge. Clamp the height gauge into the sample fixture, and move the fire pipe to touch the center of the gauge, which meets the standard requirements. When adjusting the flame length, align the flame length gauge with the side of the flame, and the width of the flame length gauge is the flame length required by the standard.
B sample preparation:
(1) Cut 10 samples to be tested and standard combustion test paper
Note: After the test, the surface combustion state of the standard combustion test paper will be evaluated to judge the combustion performance of the sample.
The size of 10 samples is 70mm×70mm, 5 samples are marked on the front side, and 5 samples are marked on the back side. The size of 10 pieces of standard combustion test paper is 70mm×90mm, and a circle with a diameter of 50mm is hollowed out in the middle.
Tips: The front and back sides of the sample are subjected to 5 burning tests. The standard combustion test paper is NNN-P-40b, No. 2 lens paper.
Standard provides the user with this how-to guide. Read these operating instructions and applicable standards before use. Distributors and agents of Standard are not liable for damages caused by users not following this operation manual or improper operation. It also includes the consequences of non-compliance with local health, safety and pollution regulations.
(2) Brush treatment
Each surface fluff sample should be treated with a brushing tool first, and this operation is not required for non-fluff samples. Standard can supply bristle units that comply with this test.
Tip: The bristle device can be used universally with the 45° burn tester. When brushing the bristles, the vertical pressure is 75±10g.
(3) Install the sample on the sample holder
Install the sample in the sample fixture, the installation sequence is: lower splint→sample→standard combustion test paper→upper splint. When installing, ensure that the sample is flat, and that the sample and the combustion test paper are in the center of the fixture. For thin specimens, the clips included in the accessories shall be used for clamping.
Tips: Since the accessory contains 5 sample holders, 5 samples (together with the standard combustion test paper) can be loaded into the corresponding holders at one time. The five samples were all positive or negative facing up.
(4) Sample humidity adjustment
Put the loaded sample into the oven and dry for 30min. The oven temperature is 105±3°C. Then put the sample taken out on the desiccant to dry for 30-60min.
Tip: Do not touch the surface of the sample after brushing when taking the sample, and do not put more than 5 dried samples on the desiccant at one time.
C starts the test.
(1) Start the test
Place the assembled and dried specimen (specimen holder) on the specimen holder.
Tip: If the sample has been pretreated, the test operation should be started at this time. The standard stipulates that the test should be started within 30s after the sample is taken out of the desiccator.
(2) Turn on the main power of the instrument to the on state. Set the ignition time to 1s on the timer and start the test
Turn on the start button of the instrument to make the instrument start to work, the burner is ignited, and the flame impact begins, and the timer automatically starts counting. Continuously test 5 samples (front or back), and perform follow-up tests after the other 5 samples are dried.
Tips: Before the test, make sure that the sample has been correctly installed on the test frame, and the correct automatic flame impact time has been set to 1s.
Classification of D fabrics
The following descriptions of the classification of various types of fabrics may assist in the interpretation of fabric flame test results.
Tip: Classify fabrics by their surface condition on standard flame test paper.
Category blanket fabric review
None of the 10 standard combustion test papers at level 1 showed burning, carbonization, or discoloration. acceptable
One or more of the 10 standard combustion test papers of level 2 showed signs of burning, carbonization and discoloration. unacceptable